

As a trusted supplier of the TAG Closed Cup Auto Flash Point Analyzer, I understand the importance of maintaining and replacing parts of this essential equipment. This blog post aims to provide a comprehensive guide on how to replace the parts of the TAG Closed Cup Auto Flash Point Analyzer, ensuring its optimal performance and longevity.
Understanding the TAG Closed Cup Auto Flash Point Analyzer
Before delving into the replacement process, it's crucial to have a basic understanding of the TAG Closed Cup Auto Flash Point Analyzer. This instrument is designed to determine the flash point of various flammable liquids accurately. The flash point is the lowest temperature at which a liquid gives off vapor in sufficient concentration to form an ignitable mixture with air near the surface of the liquid.
The analyzer consists of several key components, including the heating unit, cup assembly, ignition source, temperature sensor, and control system. Each part plays a vital role in the accurate measurement of the flash point. Over time, these components may wear out or become damaged, necessitating replacement.
Identifying the Parts that Need Replacement
The first step in replacing the parts of the TAG Closed Cup Auto Flash Point Analyzer is to identify the components that need to be replaced. This can be done through regular maintenance checks and inspections. Look for signs of wear and tear, such as cracks, leaks, or malfunctioning parts. Additionally, pay attention to any error messages or abnormal readings on the analyzer's display, as these may indicate a problem with a specific component.
Some common parts that may need replacement include the heating element, cup liner, ignition wire, temperature probe, and seals. It's important to use genuine replacement parts recommended by the manufacturer to ensure compatibility and optimal performance.
Preparing for the Replacement Process
Once you have identified the parts that need replacement, it's time to prepare for the replacement process. Start by gathering all the necessary tools and equipment, such as screwdrivers, pliers, and replacement parts. Make sure you have a clean and well-lit workspace to work in.
Before beginning the replacement process, it's essential to turn off the analyzer and unplug it from the power source to prevent any electrical hazards. Allow the analyzer to cool down completely before handling any parts to avoid burns.
Replacing the Heating Element
The heating element is responsible for heating the sample in the cup to the desired temperature. Over time, the heating element may wear out or become damaged, resulting in inaccurate temperature readings or slow heating. Here's how you can replace the heating element:
- Remove the analyzer's cover: Use a screwdriver to remove the screws holding the cover in place. Carefully lift the cover off the analyzer and set it aside.
- Locate the heating element: The heating element is usually located near the bottom of the analyzer, attached to the cup assembly. It may be secured with screws or clips.
- Disconnect the electrical connections: Use a pair of pliers to gently disconnect the electrical wires connected to the heating element. Make sure to note the position of each wire to ensure proper reconnection later.
- Remove the heating element: If the heating element is secured with screws, use a screwdriver to remove them. If it's held in place by clips, gently pry them open using a flat-head screwdriver. Carefully lift the heating element out of the analyzer.
- Install the new heating element: Place the new heating element in the same position as the old one. Reconnect the electrical wires, making sure they are securely attached.
- Secure the heating element: If the new heating element is held in place by screws, use a screwdriver to tighten them. If it's secured with clips, snap them back into place.
- Replace the analyzer's cover: Carefully place the cover back on the analyzer and secure it with the screws.
Replacing the Cup Liner
The cup liner is the part of the analyzer that holds the sample to be tested. It can become contaminated or damaged over time, affecting the accuracy of the test results. Here's how you can replace the cup liner:
- Remove the cup assembly: Use a screwdriver to remove the screws holding the cup assembly in place. Carefully lift the cup assembly out of the analyzer.
- Remove the old cup liner: The cup liner is usually held in place by a snap ring or a retaining clip. Use a pair of pliers to gently remove the snap ring or clip. Carefully lift the old cup liner out of the cup assembly.
- Clean the cup assembly: Use a clean cloth or a brush to remove any residue or debris from the cup assembly. Make sure the cup assembly is completely dry before installing the new cup liner.
- Install the new cup liner: Place the new cup liner in the cup assembly, making sure it fits snugly. Reinstall the snap ring or retaining clip to secure the cup liner in place.
- Reinstall the cup assembly: Carefully place the cup assembly back into the analyzer and secure it with the screws.
Replacing the Ignition Wire
The ignition wire is used to ignite the vapor in the cup. If the ignition wire becomes damaged or worn out, it may not be able to ignite the vapor properly, resulting in inaccurate test results. Here's how you can replace the ignition wire:
- Locate the ignition wire: The ignition wire is usually located near the top of the cup assembly, attached to the ignition source. It may be secured with a screw or a clip.
- Disconnect the ignition wire: Use a pair of pliers to gently disconnect the ignition wire from the ignition source. Make sure to note the position of the wire to ensure proper reconnection later.
- Remove the old ignition wire: If the ignition wire is secured with a screw, use a screwdriver to remove it. If it's held in place by a clip, gently pry it open using a flat-head screwdriver. Carefully lift the old ignition wire out of the analyzer.
- Install the new ignition wire: Place the new ignition wire in the same position as the old one. Reconnect the ignition wire to the ignition source, making sure it is securely attached.
- Secure the ignition wire: If the new ignition wire is held in place by a screw, use a screwdriver to tighten it. If it's secured with a clip, snap it back into place.
Replacing the Temperature Probe
The temperature probe is used to measure the temperature of the sample in the cup. If the temperature probe becomes damaged or inaccurate, it may affect the accuracy of the test results. Here's how you can replace the temperature probe:
- Locate the temperature probe: The temperature probe is usually located near the bottom of the cup assembly, inserted into the sample. It may be secured with a screw or a clip.
- Disconnect the temperature probe: Use a pair of pliers to gently disconnect the electrical wires connected to the temperature probe. Make sure to note the position of each wire to ensure proper reconnection later.
- Remove the old temperature probe: If the temperature probe is secured with a screw, use a screwdriver to remove it. If it's held in place by a clip, gently pry it open using a flat-head screwdriver. Carefully lift the old temperature probe out of the analyzer.
- Install the new temperature probe: Place the new temperature probe in the same position as the old one. Reconnect the electrical wires, making sure they are securely attached.
- Secure the temperature probe: If the new temperature probe is held in place by a screw, use a screwdriver to tighten it. If it's secured with a clip, snap it back into place.
Replacing the Seals
The seals are used to prevent leakage of the sample and the vapor from the cup. If the seals become damaged or worn out, they may not be able to provide a proper seal, resulting in inaccurate test results or safety hazards. Here's how you can replace the seals:
- Locate the seals: The seals are usually located around the cup assembly, between the cup and the lid. They may be made of rubber or silicone.
- Remove the old seals: Use a pair of pliers to gently remove the old seals from the cup assembly. Make sure to clean the surface of the cup and the lid before installing the new seals.
- Install the new seals: Place the new seals in the same position as the old ones, making sure they fit snugly. Press the seals firmly into place to ensure a proper seal.
Testing the Analyzer After Replacement
After replacing the parts of the TAG Closed Cup Auto Flash Point Analyzer, it's important to test the analyzer to ensure it is working properly. Follow these steps to test the analyzer:
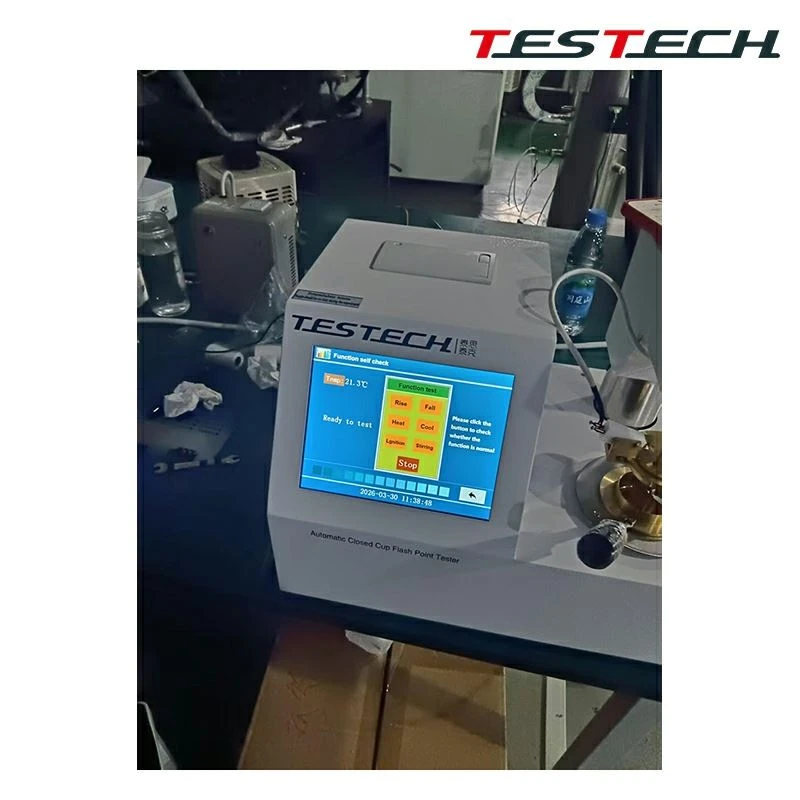

- Reconnect the power source: Plug the analyzer back into the power source and turn it on.
- Calibrate the analyzer: Follow the manufacturer's instructions to calibrate the analyzer using a certified reference material.
- Run a test: Place a sample of the flammable liquid in the cup and run a test using the analyzer. Make sure the test results are within the expected range.
- Check for any leaks or malfunctions: Inspect the analyzer for any leaks or malfunctions. If you notice any problems, contact the manufacturer or a qualified technician for assistance.
Conclusion
Replacing the parts of the TAG Closed Cup Auto Flash Point Analyzer is an important part of its maintenance and upkeep. By following the steps outlined in this blog post, you can ensure that your analyzer is working properly and providing accurate test results. If you have any questions or need further assistance, please don't hesitate to contact us. We are here to help you with all your analytical instrument needs.
In addition to the TAG Closed Cup Auto Flash Point Analyzer, we also offer a range of other Electrical Burner Test Machine testing equipment, including Realistic-Condition Fire Resistance Tester for Trains, Aircraft Seat Flammability Test Apparatus, Thermal Radiation Flame Propagation Tester, and Pensky-Martens Closed Cup Flash Point Tester. If you are interested in purchasing any of these products, please contact us to discuss your requirements. Our team of experts will be happy to assist you in finding the right solution for your needs.
References
- "TAG Closed Cup Auto Flash Point Analyzer User Manual," Manufacturer's Documentation.
- ASTM International Standards for Flash Point Testing.
- ISO Standards for Flammability Testing.