

If you work in building materials manufacturing, fire safety testing, or regulatory compliance, you’ve likely relied on a Building Material Smoke Density Tester to evaluate how products perform when exposed to fire. These instruments measure the amount of smoke emitted by materials under controlled combustion, a critical metric because smoke is responsible for more fire-related fatalities than flames in many cases. But one question I get asked more than any other—by new product engineers, quality control leads, and even seasoned safety inspectors—is this: How often should I calibrate my smoke density tester?
Let’s start with why calibration matters. A smoke density tester doesn’t just “measure” smoke; it quantifies light attenuation through a chamber filled with combustion gases. If the instrument’s sensors are out of alignment, its light source is degraded, or its chamber has accumulated soot from previous tests, the readings will be inaccurate. For example, a factory producing fire-resistant wall panels can’t afford to rely on a test that marks a product as “low-smoke” when it actually emits life-threatening levels of smoke during a fire. That’s not just a compliance issue—it’s a public safety issue. And as a supplier of fire testing equipment, I’ve seen firsthand how skimping on calibration leads to costly recalls, failed audits, and even serious safety oversights.
So, what is the correct calibration interval for a Building Material Smoke Density Tester? The short answer is: It depends on several factors, from how often you use the machine to the standards you’re testing against, and the environment it’s operated in. But let’s break this down to make it actionable.
First, you need to look at the standards your product is held to. Most regions require smoke density testing to be done to specific test methods—like ASTM E662 (Standard Test Method for Specific Optical Density of Smoke Generated by Solid Materials) or ISO 5659-2 (Smoke Generation—Part 2: Single-chamber method for determination of optical density). These standards often outline calibration requirements, even if they don’t explicitly state a fixed interval. For instance, ASTM E662 specifies that the test apparatus must be calibrated with a reference filter of known transmittance at the start of each test run, but it also recommends a formal calibration of the entire instrument every 12 months for regular users. However, that’s a baseline, not a one-size-fits-all rule.
Next, consider your usage frequency. If you’re a small manufacturer testing 10 samples a month, your calibration needs are different from a third-party testing lab that runs 50+ tests a week. More frequent use means more wear on the instrument’s components: the light source (usually a tungsten filament bulb) burns out faster, the optical sensors accumulate more soot, and the chamber’s walls degrade from repeated combustion. For high-volume users, I typically recommend calibrating your smoke density tester every six months. Even if your standards don’t require it, more frequent calibration ensures consistency in readings across batches of products. For infrequent users—say, testing new product lines only a few times a quarter—you can stretch that to 12 to 18 months, but only if you perform a pre-use check every time you run a test. What’s a pre-use check? Testing a reference material (like a certified polystyrene sample with known smoke density) alongside your unknowns to verify the instrument is reading correctly before you record results.
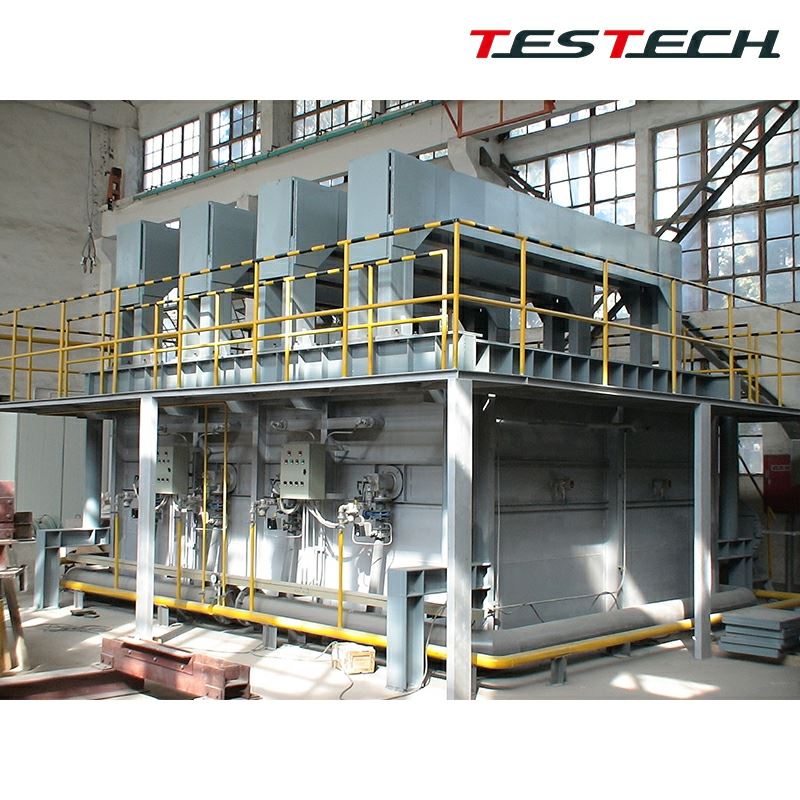

Then there’s the operating environment. If your tester is in a dusty factory floor, a humid lab, or a space where temperatures fluctuate wildly, it will drift out of calibration faster than one in a climate-controlled, clean testing facility. Dust can coat the light sensor, skew readings low (making smoke levels seem smaller than they are), while high humidity can cause electrical components to misalign. I’ve had customers who run testers in construction material manufacturing plants come to me saying their readings were off by 15%—just because dust had settled on the light beam path. For these users, a 6-month calibration interval is non-negotiable, and I also recommend doing a deep clean of the instrument’s chamber and optical components every three months as part of routine maintenance.
Another factor is whether your instrument is integrated with other fire testing equipment. Many building material manufacturers use a suite of testers to ensure full compliance. For example, if you’re testing paper-faced gypsum boards, you might pair your smoke density tester with a Paper-Faced Gypsum Board Fire Stability Tester to evaluate both smoke emission and structural integrity during fire. If you’re testing exterior cladding, you might use a Fire Resistance Horizontal Test Furnace alongside your smoke density tester to replicate real-world fire conditions more accurately. When multiple instruments work together, calibration of one can affect the others. If your smoke density tester is connected to a furnace that controls combustion temperature, a misaligned smoke tester might give a false reading that makes you adjust the furnace’s settings incorrectly. That’s why I always recommend aligning calibration intervals across your entire set of testing equipment—so if you calibrate your furnace, you calibrate your smoke tester at the same time.
You might be wondering: What happens if I skip calibration? Let’s use a real example (I’ve seen this with a mid-sized gypsum board manufacturer last year). They used their smoke density tester once a month, thought it was fine, and skipped calibration for two years. When their local fire marshal audited their facility, they tested a batch of their boards and found the smoke density readings were 22% lower than the actual value. That meant their boards didn’t meet the local building code’s smoke emission requirements, and they had to recall 10,000 panels at a cost of over $50,000, plus they lost a contract with a major construction company. All because of missed calibration. That’s why compliance bodies and third-party labs take calibration so seriously—they often require proof of calibration for every test result you submit.
Now, how do you properly calibrate a Building Material Smoke Density Tester? It’s not just turning a knob and calling it done. The process should follow the manufacturer’s guidelines (which you can find in the instrument’s manual) and include three key steps: First, calibrate the light source using a reference filter with a known transmittance value. This confirms that the light beam the sensor is measuring is consistent with standard values. Second, test a certified reference material (like NIST-traceable polystyrene) to verify that the smoke density readings match the material’s known value. Third, inspect the instrument’s chamber, light path, and sensors for any damage or buildup, and clean them if necessary. If you’re not comfortable doing this in-house, most reputable fire testing equipment suppliers (including us) offer on-site calibration services, or you can send the instrument back to our facility for precision calibration.
Wait a minute—let’s circle back to the initial question: Is there a standard calibration interval? As I mentioned, it’s not fixed, but most industry experts and standard bodies align with this framework: for regular users (20+ tests/month), every 6 months; for moderate users (10-20 tests/month), every 9 months; for infrequent users (under 10 tests/month), every 12 months. But don’t treat this like a hard rule. Keep a calibration log for your tester, track readings from reference materials over time, and if you notice a sudden shift in readings (even if it’s within the standard’s acceptable range), calibrate immediately. I’ve had customers who, after a year of testing, noticed their reference material readings were 5% lower than before—turns out the light bulb was reaching the end of its life, and calibration caught it before it caused any issues.
Let’s also talk about why calibration isn’t just a box-ticking exercise. The data from your smoke density tester is used to make critical decisions: Are your products safe for use in schools, hospitals, or high-rise buildings? Do they meet international building codes? Will they protect occupants in case of fire? A mis-calibrated instrument can lead to products that look safe on paper but pose a real risk to people. As a supplier of building material flammability testing equipment, my job isn’t just to sell you a tester—it’s to make sure your results are reliable, and that starts with proper calibration. That’s why I always advise new customers to invest in regular calibration, not just a one-time check when they first get the instrument.
You might also be wondering: Are there any tools or resources to help manage calibration intervals? Absolutely. Most fire testing equipment brands offer calibration tracking software, and we provide a free tool for our customers to log test dates, reference material results, and calibration due dates. We also recommend pairing your smoke density tester with other necessary equipment, like a Non-Combustibility Test Apparatus to verify basic fire resistance before moving to smoke testing, or a Building Material Flammability Apparatus for full flammability assessments. Having a complete suite of equipment makes it easier to align calibration schedules, so you’re never missing a check.
Another common question: Can I calibrate the tester myself, or do I need a professional? For basic checks (like pre-test reference material checks), you absolutely can do that in-house. But for formal, ISO or ASTM compliant calibration, you need a certified technician who uses traceable reference standards. We offer certified calibration services that provide documentation you can submit to auditors and regulatory bodies, which is essential for manufacturers that need to prove their test results are accurate.
Let’s wrap this up. The calibration interval for a Building Material Smoke Density Tester isn’t a single number—it’s tailored to your usage, environment, and regulatory requirements. But the key takeaways are: Calibrate every 6 to 12 months for regular use, more often if you operate in harsh conditions, and always verify with reference materials before you run production tests. Skipping calibration isn’t worth the risk—whether that’s a product recall, a failed audit, or, most importantly, putting lives at risk.
If you’re not sure when your tester was last calibrated, or you need help setting up a calibration schedule for your facility, we’re here to help. We work with manufacturers, testing labs, and regulatory bodies around the world to ensure their fire testing equipment is accurate and compliant. Whether you need on-site calibration, replacement parts for your smoke density tester, or additional equipment to complete your fire testing suite, our team can support you. Don’t wait for an audit or a failed test to address calibration—reach out to us today to learn how we can help keep your testing reliable.
References
- ASTM E662-21, Standard Test Method for Specific Optical Density of Smoke Generated by Solid Materials, ASTM International, West Conshohocken, PA, 2021.
- ISO 5659-2:2017, Smoke generation from combustion products of solid materials – Part 2: Determination of optical density, International Organization for Standardization, Geneva, 2017.
- NFPA 701-2022, Standard Methods of Fire Tests for Flame Propagation of Textiles and Films, National Fire Protection Association, Quincy, MA, 2022.
- UK Building Regulations Approved Document B: Fire Safety, 2022 Edition, Office of the Deputy Prime Minister, London, 2022.
- CEN/TS 1187:2012, Test methods for external fire exposure to roofs, European Committee for Standardization, Brussels, 2012.